Riyas P.K-Fab Academy 2016
Computer Controlled Cutting
After two weeks on computer and softwares we finally had a chance to get on hands with some machines.This week's assignment is to create a press fit construction kit and cut something on the vinylcutter.I learned more about it from this tutorial.It is like lego,but can use to create useful stuff.
Vinyl Cutter
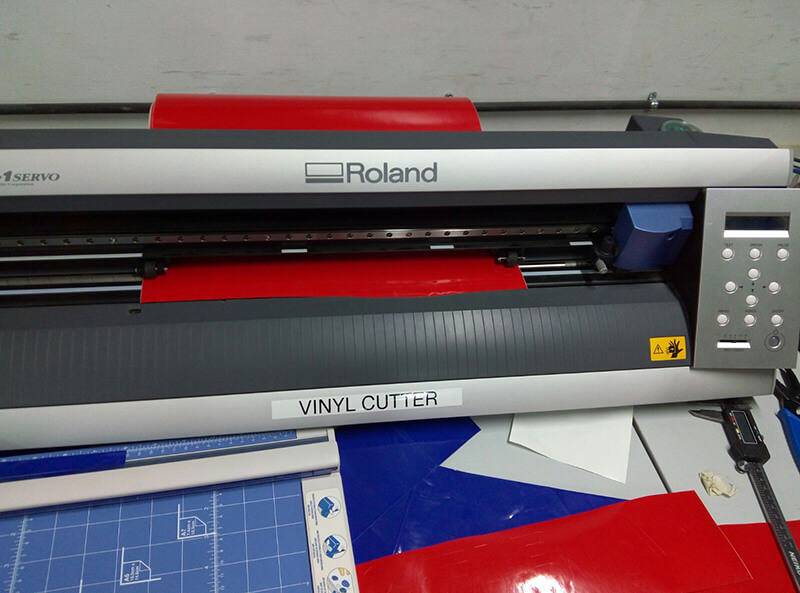
A vinyl cutter is a CNC machine,it looks like a printer and is used to print stickers.We use fab modules to control the vinyl cutter.Learn more about fab modules from here.It now has a web version,which makes it more easier to control machines.The vinyl cutter we use is Roland CAMM 1 Servo.I created a logo (kind of) for my project using photoshop.
I created it using vector images from Flaticon.com.I saved it as a .png file.Download the design in psd(photoshop) format.
Working with Vinyl cutter
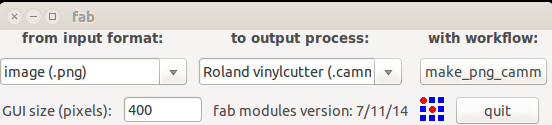
In order to access fab modules(ubuntu) type 'fab' in terminal.It will bring up following window.
Now select input format(in my case .png) and the output process as Roland Vinyl.Then click 'make_png_camm'.Now another window will come up.
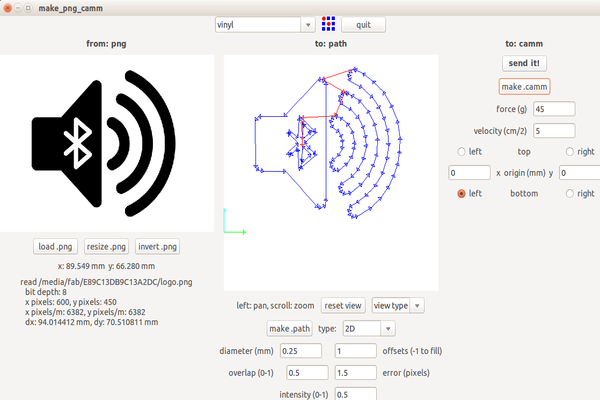
- Resize the image(if needed).
- Select the material(vinyl).
- Make path.
- Make .camm
- Send it.
Follow these in given order.
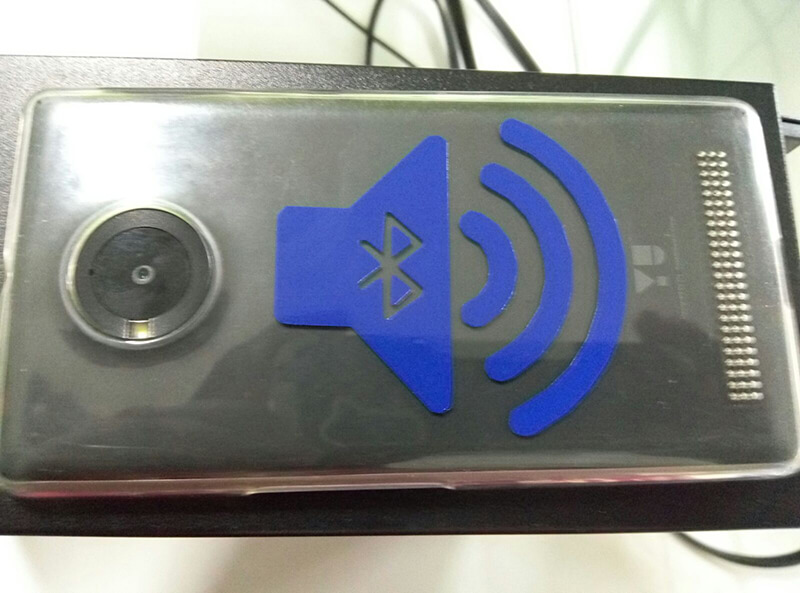
Before sending it,first load the vinyl sheet or roll on the machine.During loading we have to ensure some things,such as the rollers on the front side are kept over the vinyl sheet and also check if its positioned on the white markings on the vinyl cutter.Then select sheet or roller according to your preference.After that set the origin by pressing the origin button and click the send it in the desktop window.After the machining process remove the excess parts and mask it using masking tape,now you can place the sticker on prefered space.I placed it over my phone cover and here is the result.
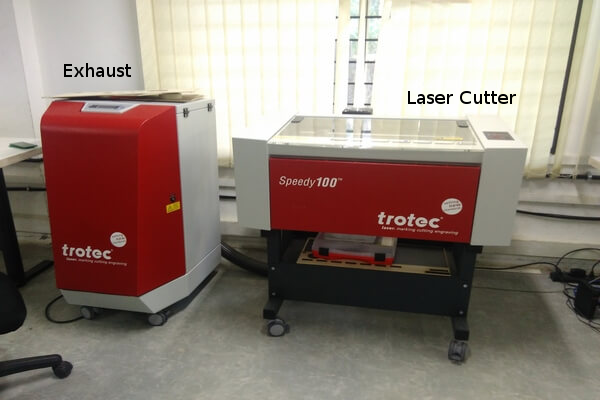
Laser Cutter
The press fit construction kit is to be created with the laser cutter.It is also a CNC machine,which uses laser to cut materials.
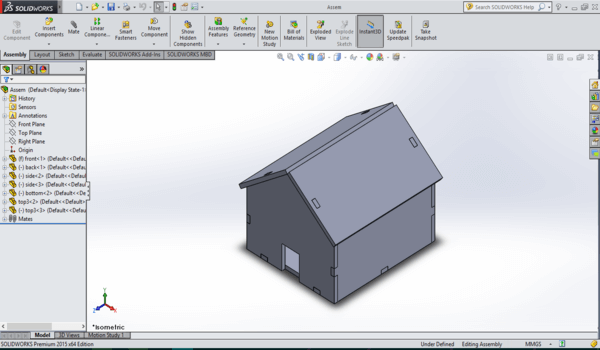
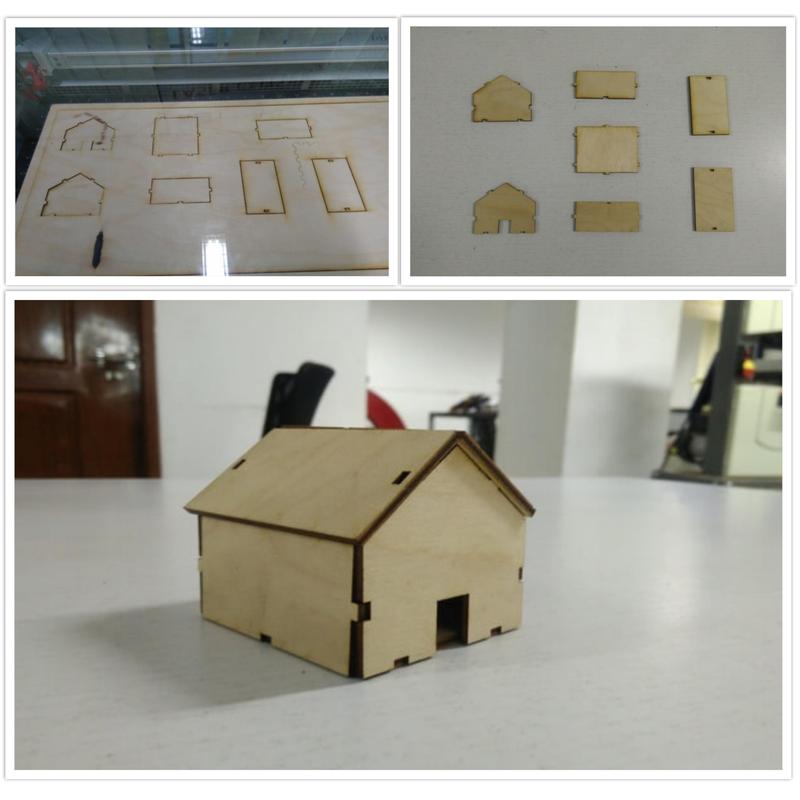
I used Solidworks to create the design.I decided to create a miniature house.For this I created parts viz front,back side,top,bottom.I finally joined it together using assembly to check the design,and it fits correctly.
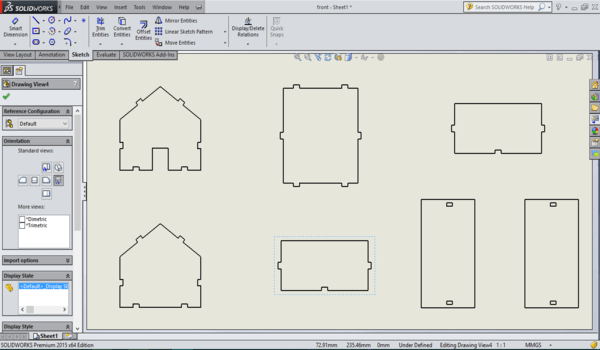
After that, I created drawing sheet using Solidworks which includes all parts to be cut and saved it as dxf format.
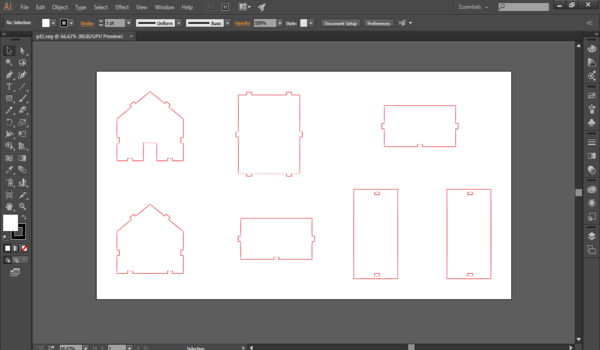
I tried to open the dxf file in Coreldraw as it was the software availabe in computer connected to laser printer,but Coreldraw changes my dimensions and the whole design messed up.So I opened the design using Illustrator, changed the drawing color to red (the cut lines are configured with red in laser cutter software) and saved it as svg file.This time I opened it on inkscape,it opened correctly.There was no change in dimension.
Then I hit print option in inkscape,slected 'trotec' as printer.We can choose the material, speed, power etc by clicking on Properties.When we hit on pring,it brings up the trotec software 'Job control',with our design file.
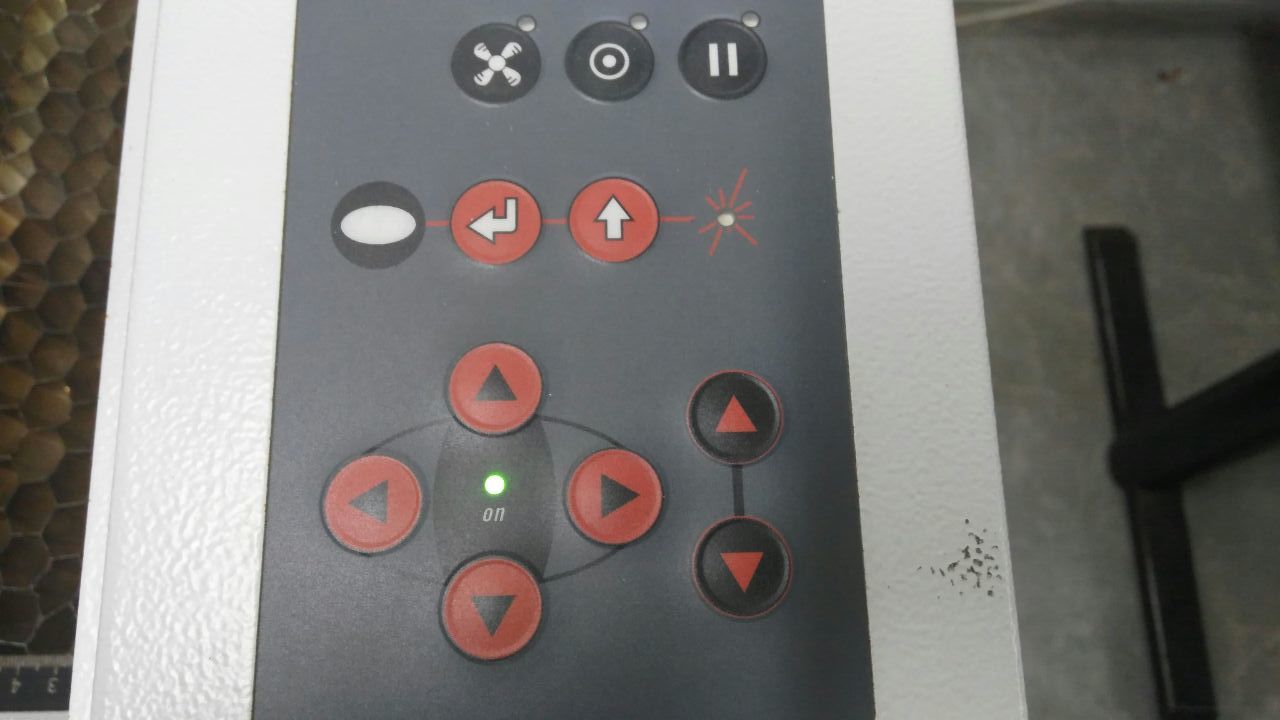
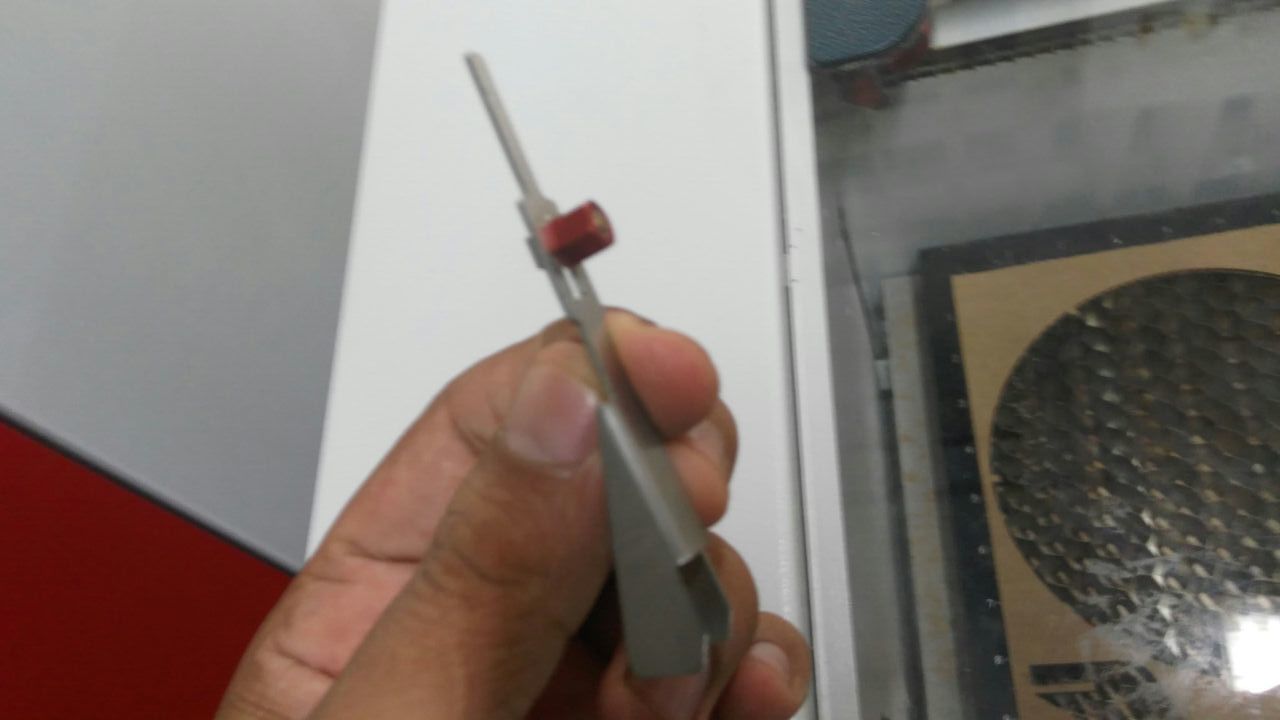
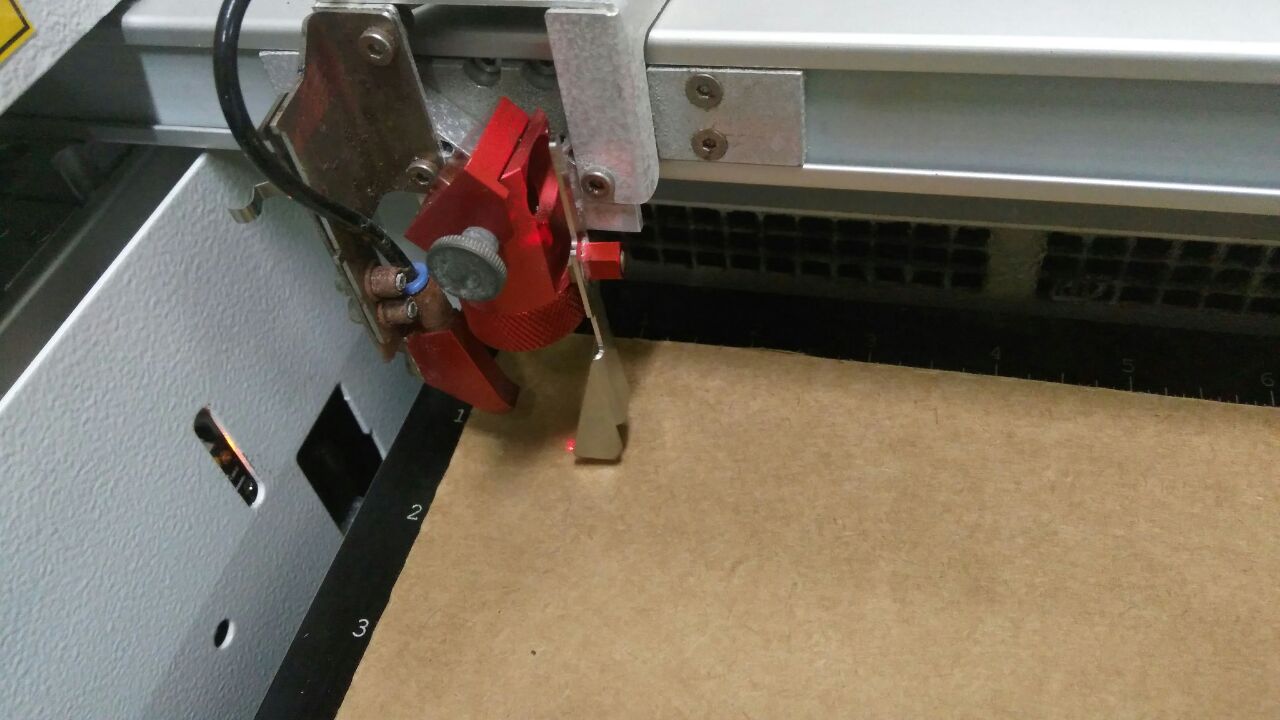
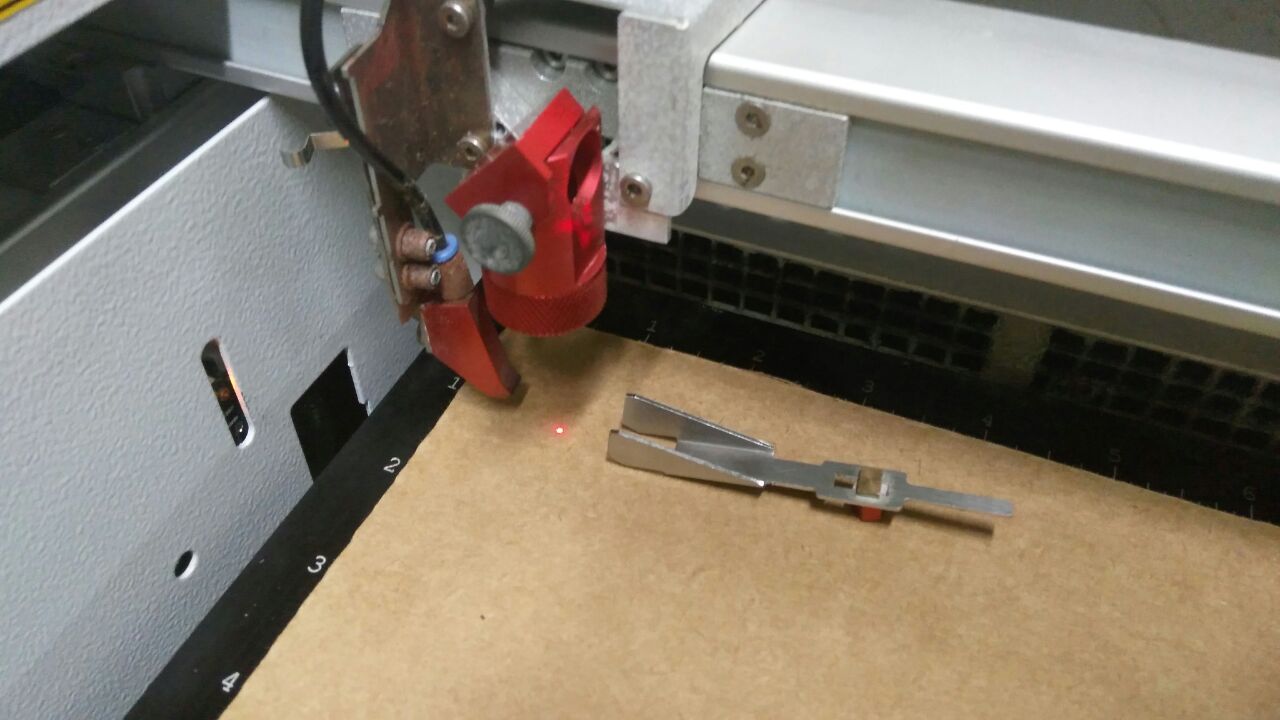
Then comes the machine part.Place the material on bed.The bed can be control by up and down buttons on the machine.Before starting process, we need to focus the laser using focal tool.The position of laser can be adjusted using arrow buttons.After setting up these, we can press print in the software.This start the process,in my case cutting.At first I tested it on card board,as I didn't check the thickness it was not perfect fit.
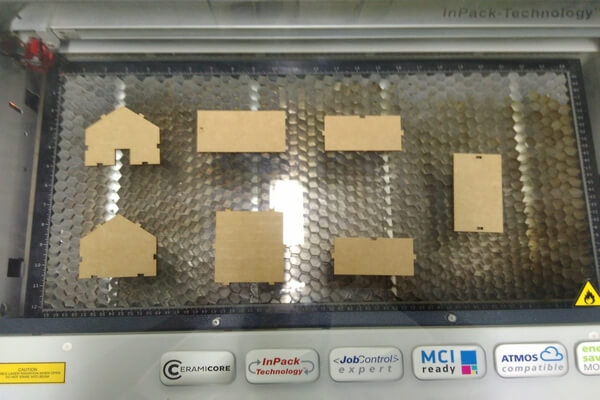
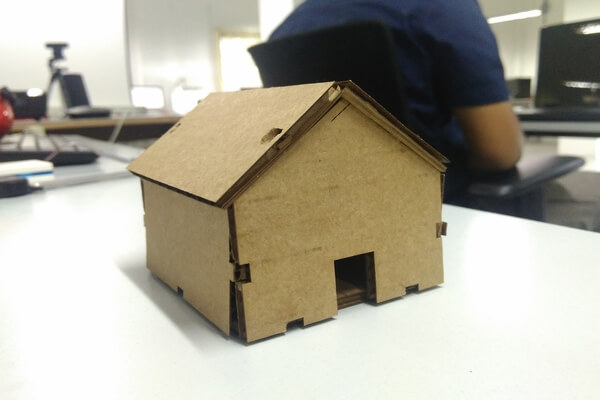
Then I used plywood,it cut well and fit together perfectly.Here is the miniature house press fit:
Download the design file in svg format
Update 26-7-2016
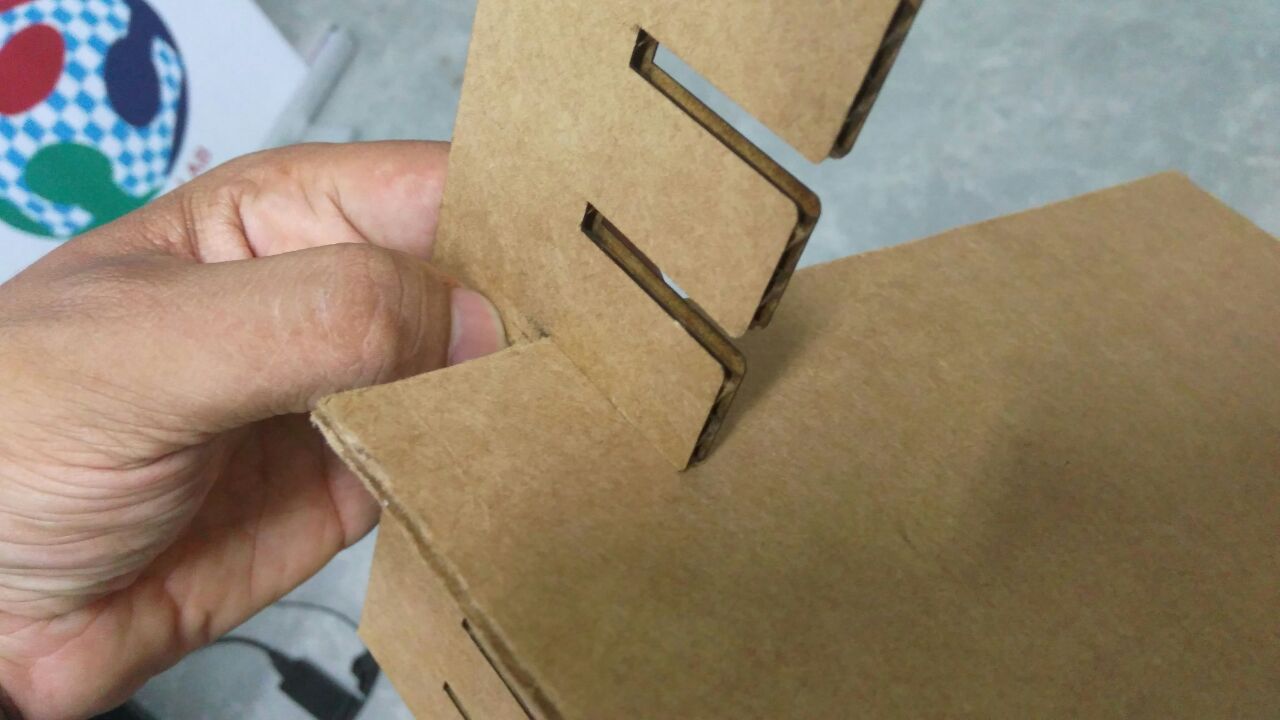
Even though I tried to pull of a press fit in my initial try, It was later understood that the parts were not holding together. The assignment was also to create a parametric design, so I was instructed to re-do this assignmenst fulfilling all the requirements.
Now that I've understood how a press-fit should look and feel like, I decided to redo this laser cutting assignment with a parametric design. Parametric design is a paradigm in design where the relationship between elements is used to manipulate and inform the design of geometries and structure of the final design.
This time I am using cardboard to create my desing. Before laser cutting the final desing, In order to understand and practically explore the concept of a press fit kit, I decided to design and laser cut a cardboard scale comb.
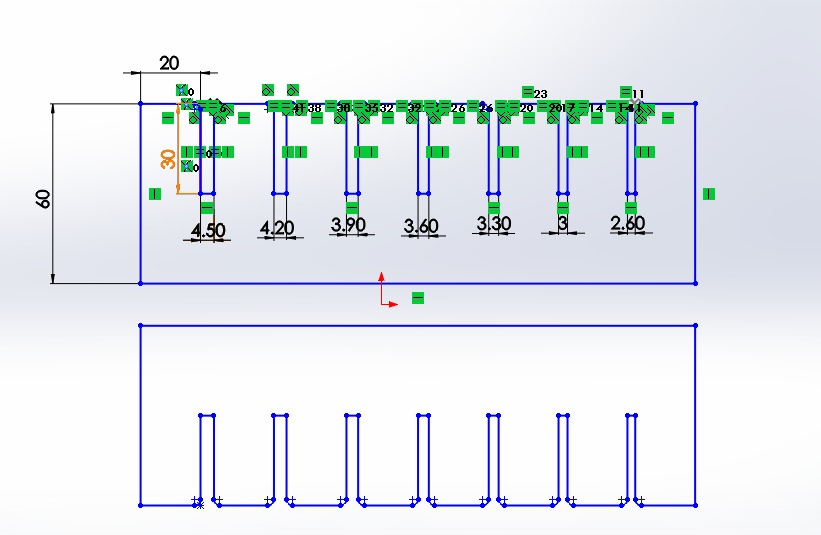
I drew the desing for the pressfit comb in Solidworks, exported as dxf. I copied the file in a pen drive and open the same file in Corel draw installed in the system in which laser cutter was installed. I selected the print command and selected the material as cardboard.
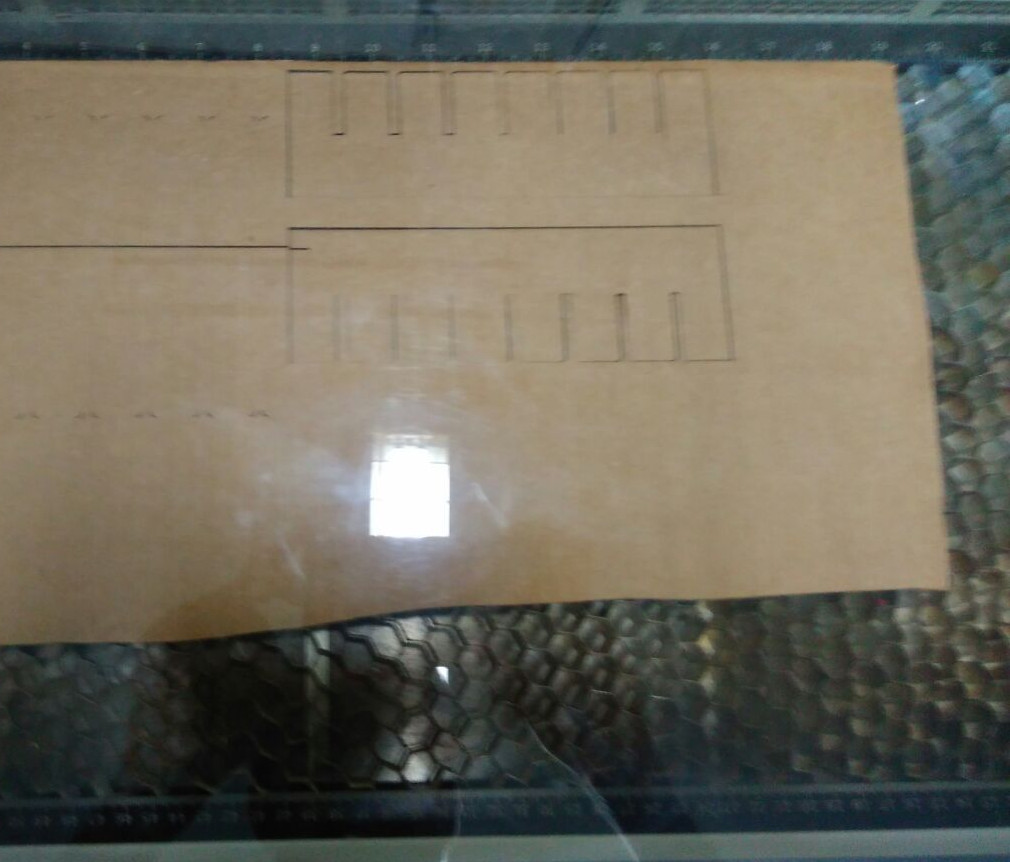
The laser cutter engraves and cuts materials based on the speed to power ratio we set in job control software. To cut this particular cardboard scale comb, I set the power as 80% and speed as 3% in Job Control software.. Then, I placed the cardboard peice on the laser cutting bed, focused the laser using focusing tool. On hitting the play button on job control software, the laser cutter took less than a minute to cut this complete design.
Now this combscale can be used to refer and measure the thickness of the materials with which I can make laser cut press fit kits. The thickness of the cardboard measured in the above image using combscale was found to be 3.60mm.
Laser cutting a parametric design
To complete this week's assignment with outmost perfection, I created a parametric design and laser cut it using cardboard. The process is explained below.
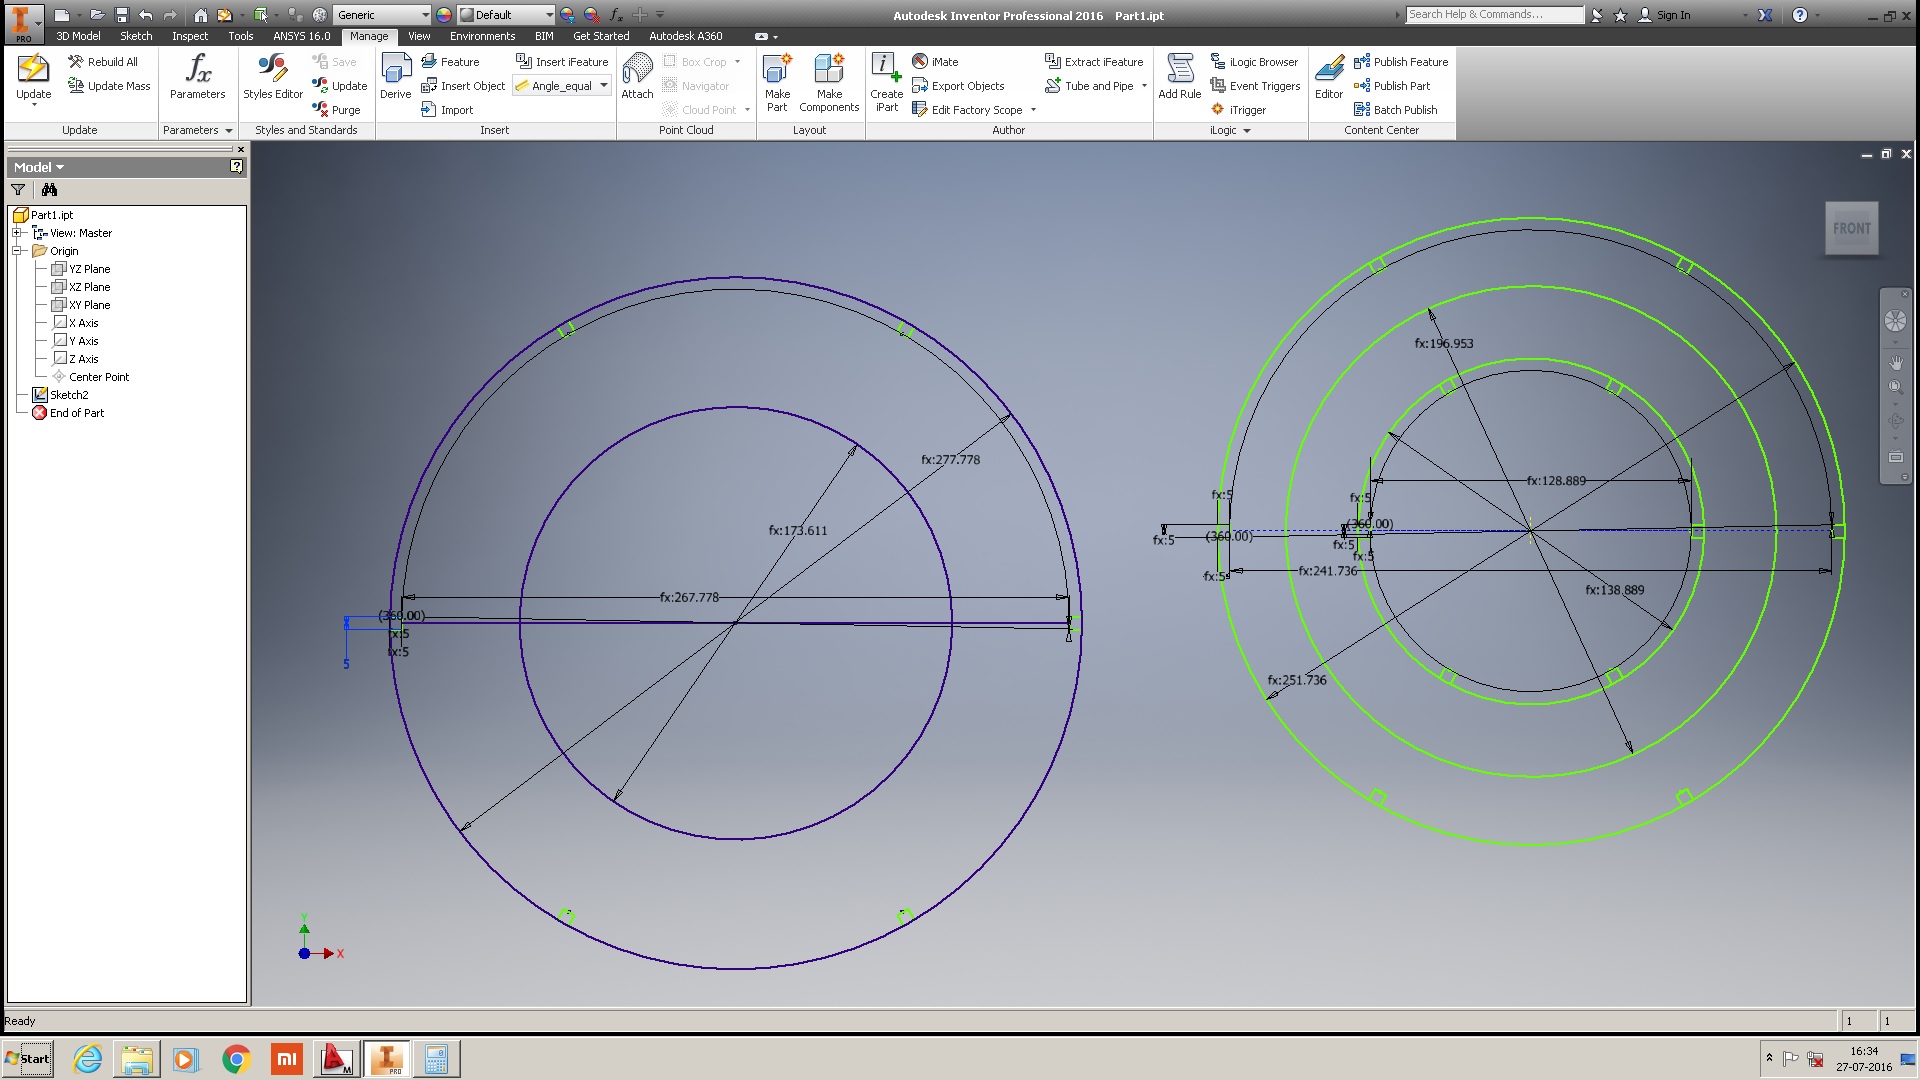
This time around, as I had was focused on making a parametrically designed simple and useful product. I used Autodesk Inventor as it is one of the most trusted softwares for making parametric design. The idea is to design a fruit basket in such a way that the design parameter of the whole design will be the thickness (d0) of the material(cardboard) used.
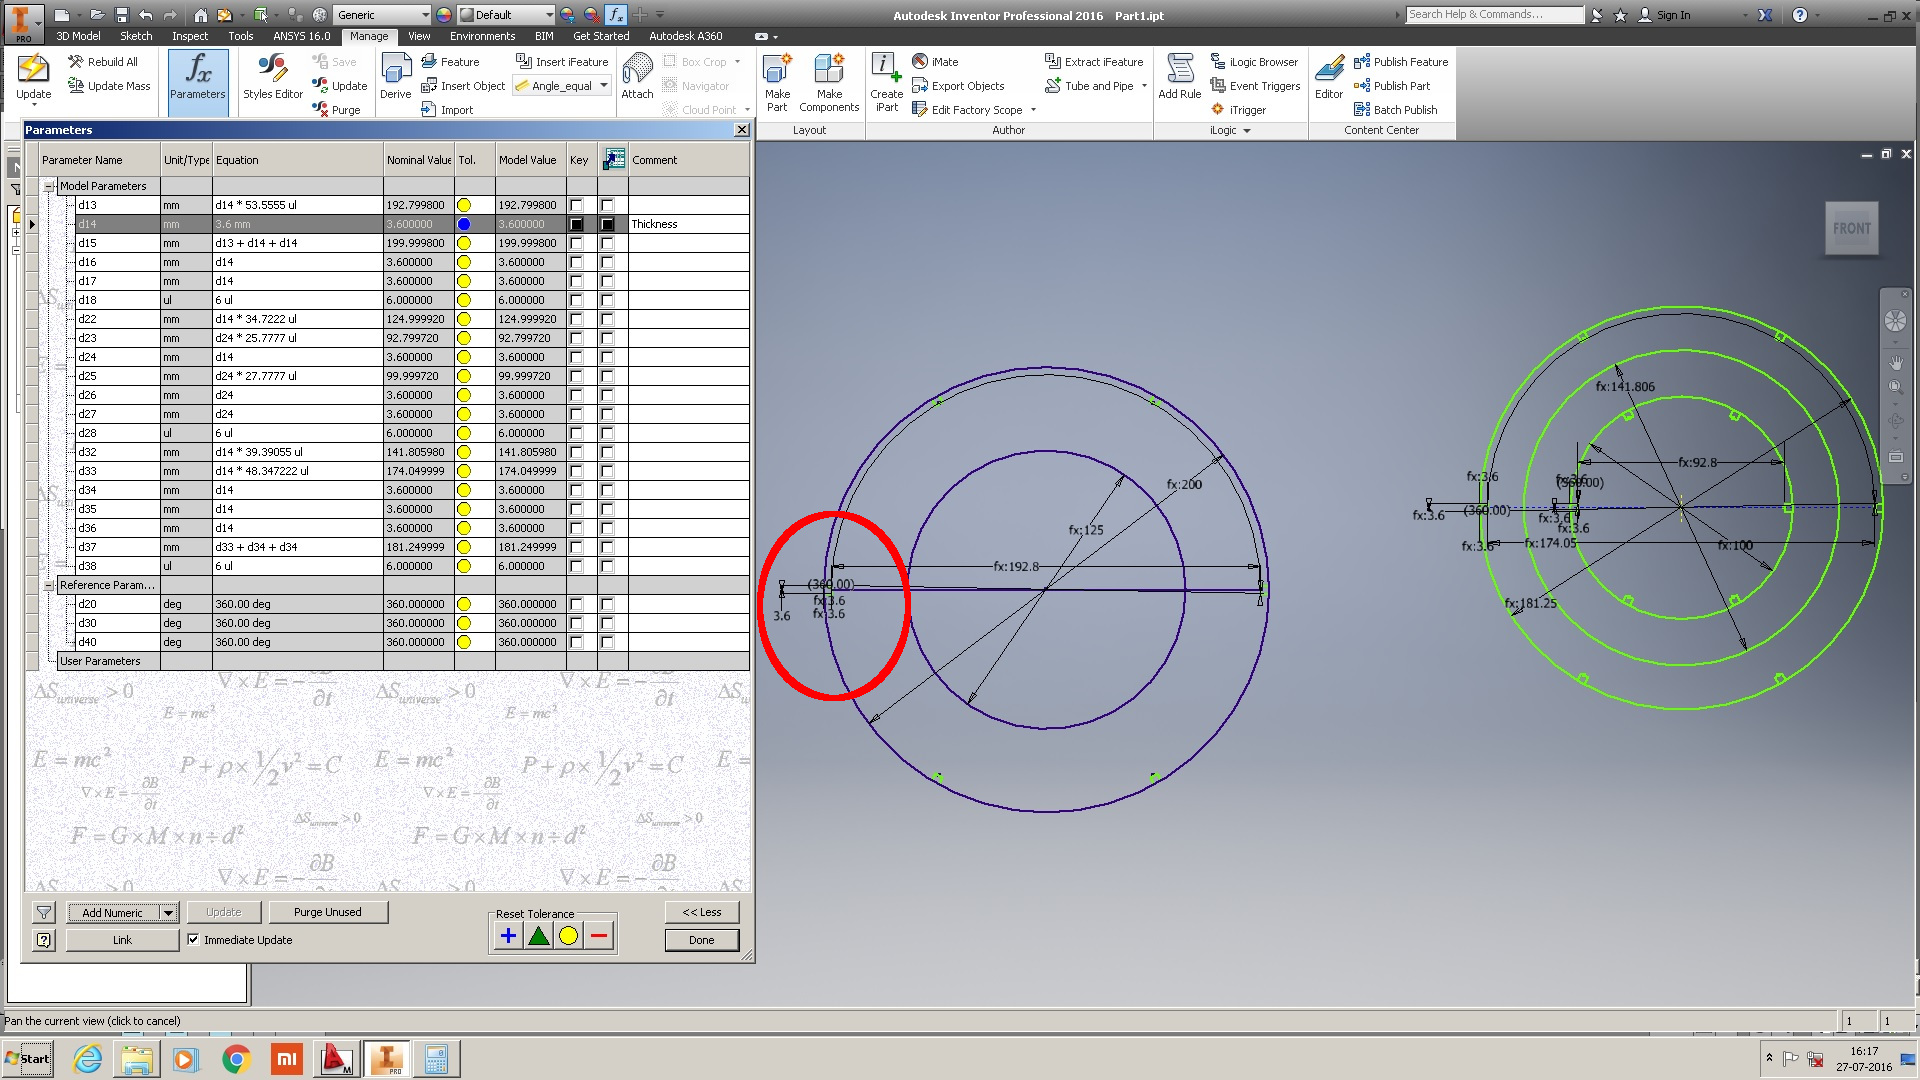
On changing the dimensionn of thickness(d0), the associated parameters changes accordingly.

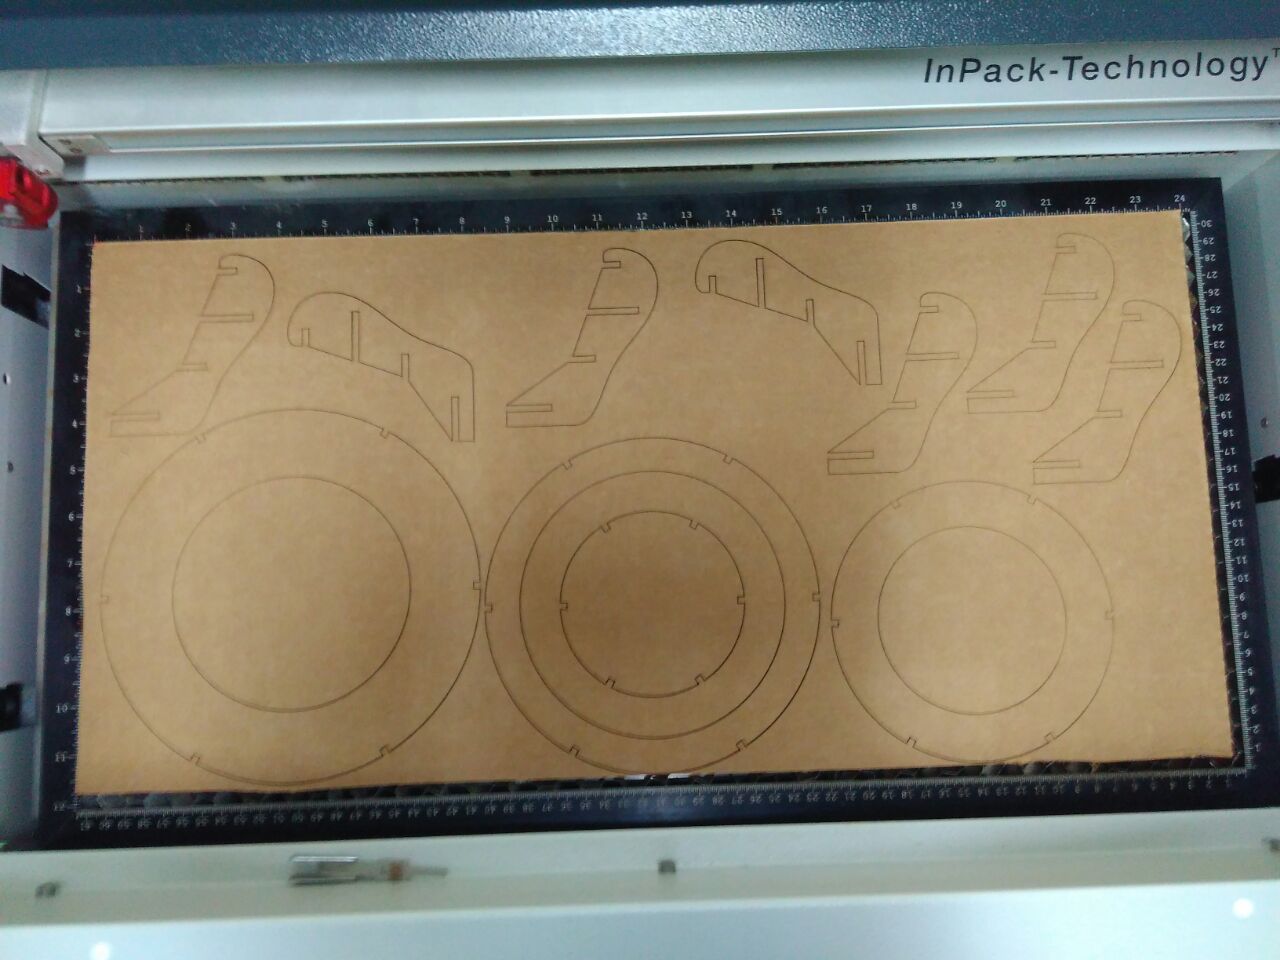
Once I completed designing the press fit parts of my cardboard fruit basket, I exported the dxf file from Autodesk Inventor.

Then, I imported the dxf file in Autocad and rearranged all the individual parts on a single sheet to make it convenient for laser cutting. I also changed the colour of the line from black to red as Job control software of laser cutter uses red colour in its default settings for cutting parts. Then the modified file was again exported as another dxf file from autocad. I copied this dxf file to a pen drive.

I opened the newly copied file in corel draw on the system where our laser cutter is installed. In print settings I selected the material as cardboard and clicked on the print button, and the Job control window opened up.
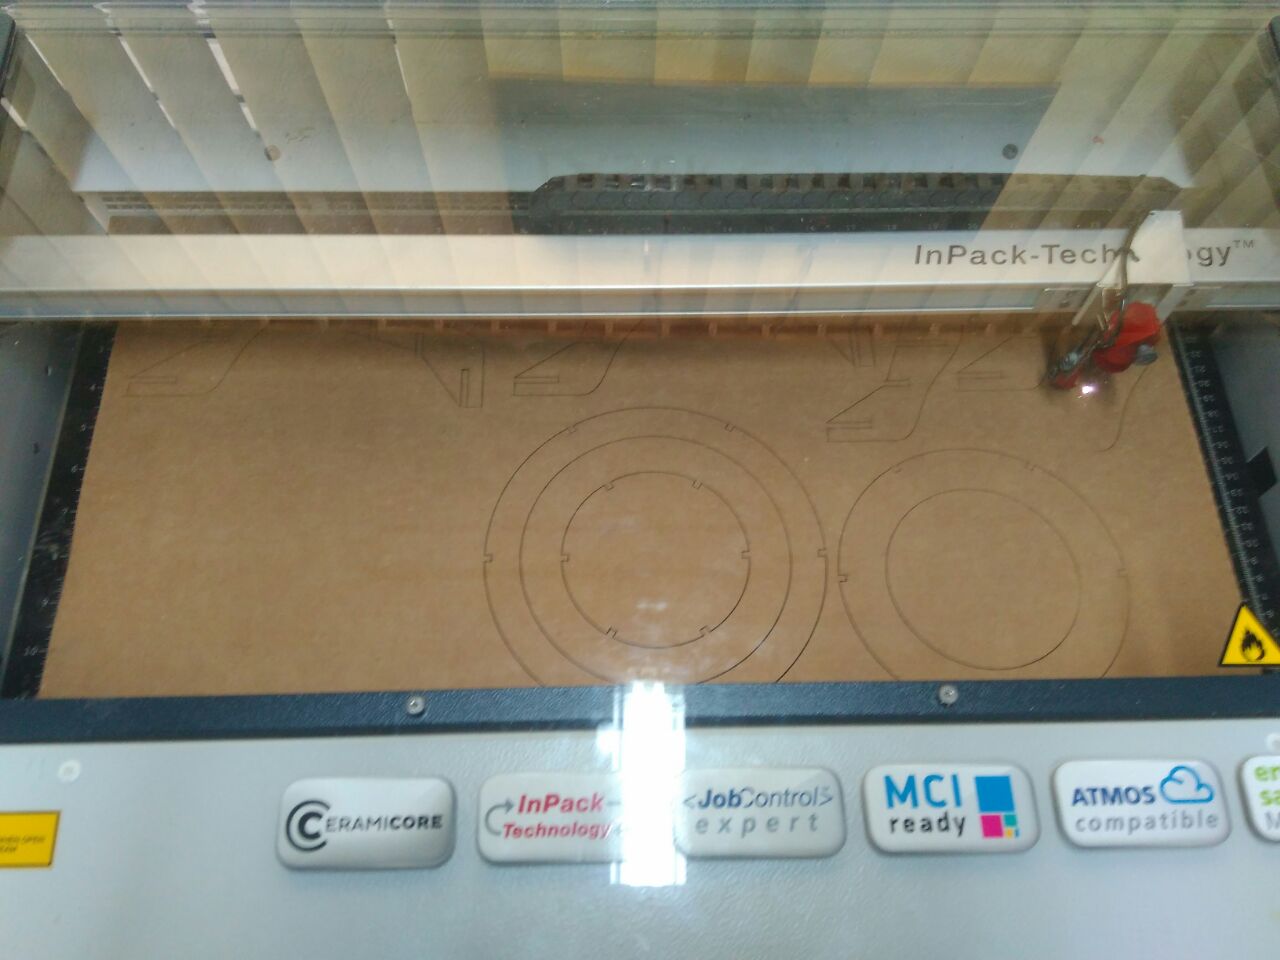
I set the power as 80% and speed as 3% on trotec speedy 100 laser cutter. I swtiched on the exhaust and after connecting the laser cutter with system on job control software, I clicked on the play button.
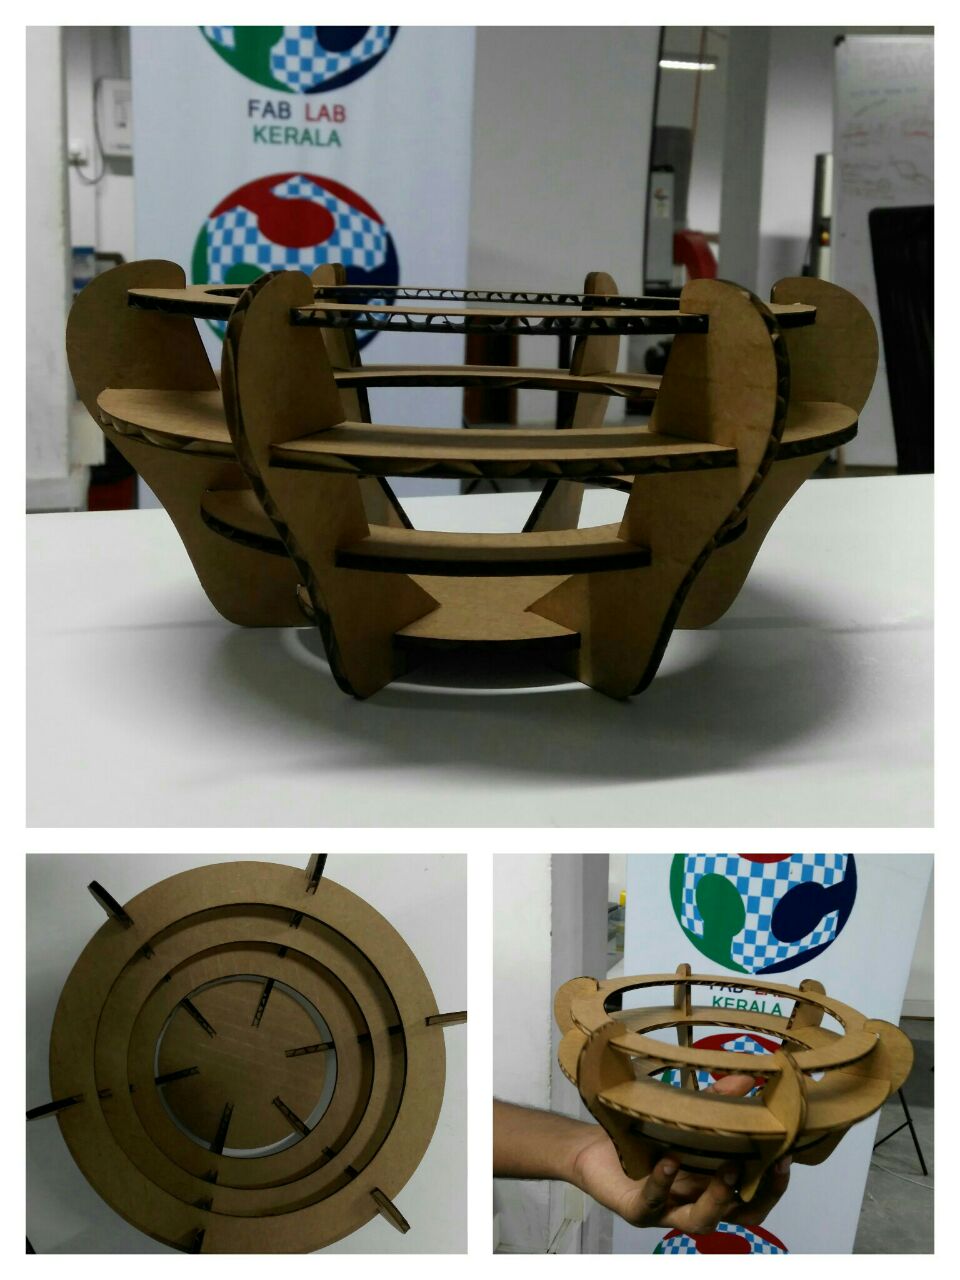
After joining the parts, this is what my final press fit looks like. It is indeed firm and sturdy and this cardboard construction can be used as an actual fruit basket.
Files
Autodesk inventor file:part1.ipt
riyas.ipt
Autocad dxf file: basket.dxf